
What Is a Crimping Tool (Types, Uses, and How They Actually Work)
Introduction
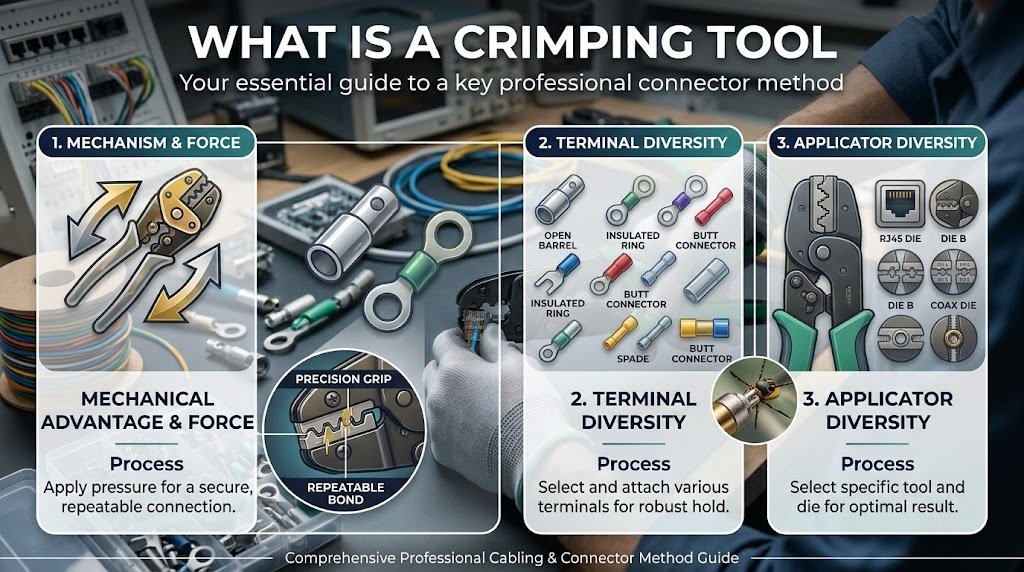
A crimping tool is basically just a gadget—could be a handheld one or powered—that squishes a connector onto a wire to lock it in. If you are wondering what is a crimping tool, it is a handy device used to attach connectors securely to wires and cables. If you’ve ever noticed a little metal terminal on a wire or a plastic plug on an internet cable, there’s a good chance it was crimped on.
It’s a great way to get a solid connection without having to mess around with soldering, but you have to use the right tool for the job. For example, a crimper meant for small electrical terminals isn’t going to do you any favors if you’re trying to put on an Ethernet plug or a heavy-duty battery cable. When exploring what is a crimping tool, it is important to understand its role in creating reliable wire connections.
What Is a Crimping Tool?
Basically, a crimping tool is just a pair of specialized pliers that squishes a connector tight onto a wire. That pressure is what locks everything in place, which is super important if you’re doing electrical work and need the connection to actually stay put.
You’ll see these used for all sorts of stuff—like putting ring terminals on stranded wire, clicking a modular plug onto an ethernet cable, or fixing up wiring in a car. Just a heads up—these aren’t one-size-fits-all. Double-check your tools and connectors before you start crimping, otherwise you’re probably just gonna ruin the part.
What Is a Crimping Tool Actually Used For?
A crimping tool is useful for electrical wiring, network cables, and other applications that require secure connections. Crimping tools attach compatible connectors securely. The application determines which tool, connector, and preparation method you need. Knowing what is a crimping tool makes it easier to compare manual, ratcheting, and specialized crimping tools.
Electrical wiring
When it comes to wiring, both electricians and DIY enthusiasts often find themselves crimping various types of terminals—like ring, spade, butt, or ferrule—onto wires that fit the bill. These little connectors play a big role; they can link conductors to devices, connect the ends of wires together, or even get stranded wire ready for a terminal block. So, it’s super important to pick the right terminals that match the size of your conductor and the job you’re doing. You don’t want to end up with something that just doesn’t fit, right?
Network and telephone cables
Specialized network crimpers are what you use to put modular plugs onto phone or ethernet cables. Just make sure the plug, the cable category, the type of wire, and the wiring layout all actually match up, otherwise it won’t work. A generic electrical-terminal crimper is not a substitute for a network crimper.
Automotive and other projects
Automotive wiring usually uses crimped terminals and sealed connectors to handle all the shaking and moisture. Just make sure you actually check the manufacturer’s instructions—don’t just assume every connector works the same way.
Types of Crimping Tools
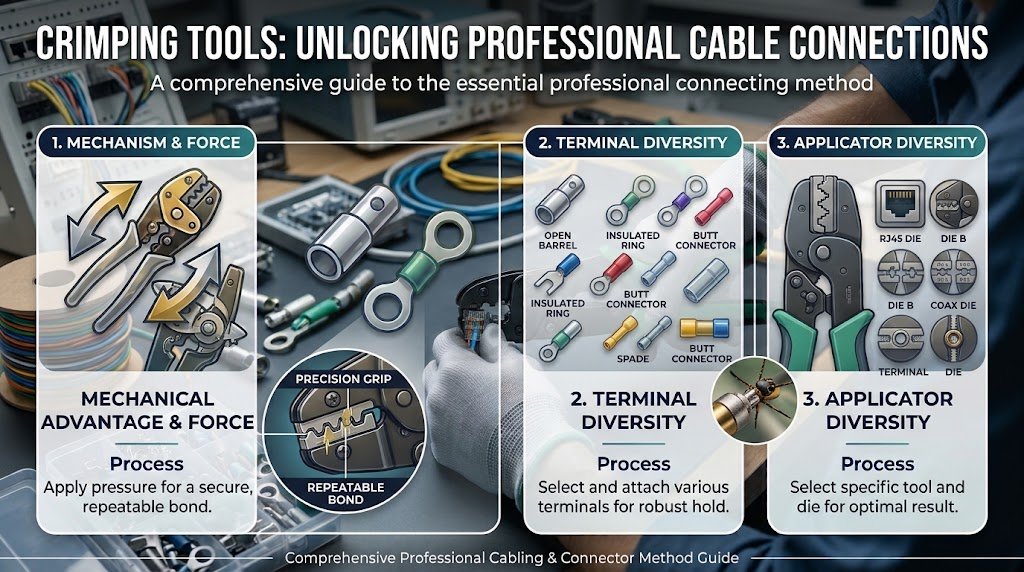
Crimping tools aren’t one-size-fits-all. They’re made for specific connectors and sizes, so if you grab the wrong one, your connection is probably just gonna slip right out.
Manual and ratcheting crimping tools
You know, basic hand crimpers are pretty handy. They’re compact and work well with a few common types of terminals. Now, if we’re talking about ratcheting models, those are a game changer! They keep the jaws locked in place through a specific cycle, which really helps you get that crimp just right—when you use them properly, of course.
Oh, and here’s a tip: always double-check that the die and connector are a match before you start crimping. It’s super important! And don’t forget—network plugs can differ based on how the cable is built. So, it’s best to stick to the manufacturer’s instructions instead of just going by how things look. Trust me, it’ll save you some headaches down the line!
Hydraulic and specialized crimping tools
Hydraulic crimpers are honestly a lifesaver. If you’re messing with huge cable lugs or heavy-duty stuff, trying to use a regular hand tool is a great way to basically snap your wrist. Just a heads up, though—if you’re doing coax, network plugs, or some of the smaller terminals, you’ll still need a tool actually made for those. Choosing the right crimping tool depends on the connector type, wire size, and the task you need to complete.
How Does a Crimping Tool Actually Work?
First, prepare your wire by stripping back the insulation like the instructions say—just be careful not to nick the wire. Push the conductor all the way into the connector, make sure it’s in the right die, and then just squeeze the handles (or hit the power switch) to crimp it.A reliable connection basically comes down to using the right wire size, connector, and die—and actually making sure the tool finishes its full cycle.
If you do not squeeze it enough it will be loose;. Knowing what is a crimping tool can help you choose equipment that produces consistent connections when used correctly.
If you push hard or press it in the wrong place you will just end up breaking the terminal or the wire. The tool applies pressure to join a connector and wire, creating a mechanical connection when the correct tool and technique are used. To understand what is a crimping tool, look at how pressure secures a compatible connector to a wire.
How to actually use a crimping tool without messing up
Start by checking your connector.Then make sure to check the manual.Look for the wire gauge. Check the strip length. Find out which tools or dies you will need.Also for the love of god follow the safety rules—make sure everything is powered down and dead before you touch it unless you are 100% sure there is a reason not to.
Alright, so here’s the deal with preparing the wire. First off, make sure you’re really careful not to nick or cut any of those tiny strands — it’s super important. Just strip off what you need, no more, no less. Once you’ve done that, push the conductor all the way in, and fit the connector into the right slot.
Now, if you’re using a crimping tool, just squeeze the handles until that cycle is done. Easy peasy, right? If you’re using a power tool, just stick to the directions they give you. And hey, one last thing: don’t go adding extra crimps unless the instructions say that’s what you should do. Trust me, it’ll save you some headaches down the line! Once you know what is a crimping tool, compare supported wire sizes and connector types before making a purchase.
Alright, so here’s what you need to do: first, take a good look at the result. Make sure that the conductor is seated properly—like, really check it out. You’ll also want to look for any visible damage. And don’t forget about the crimp location; it should be just right.
Now, if there’s a manufacturer’s pull test or some other inspection method they suggest, definitely follow that. It’s important! Oh, and if you spot any issues—like a cracked terminal, something that looks weird or distorted, if it’s loose, or if someone used the wrong tool for crimping—just go ahead and take that terminal off. No big deal. Just grab a new connector and start fresh. It’s better to do it right the first time, you know?
How to Choose the Right Crimping Tool
Alright, let’s dive in. First things first, focus on the connector. Forget about the price tag or how it looks for now. You really want to check out what wire gauge it can handle. Also, look into the connector type, the die profile, and, of course, what the manufacturer recommends.
Now, if you’re just doing a few home repairs here and there, a manual tool might do the trick just fine. But hey, if you’re planning to tackle bigger jobs or dealing with those hefty cable lugs, you might want to think about getting a ratcheting tool, a hydraulic one, or maybe even something a bit more specialized.
Remember, just because a tool says it’s “universal” doesn’t mean it will work with every terminal. It’s better to check first so you don’t end up with a mess. If you’re not sure look at the tool’s compatibility chart. Ask the connector manufacturer which crimp profile is needed. For jobs check the proper codes and talk to qualified professionals.
Just because a connector looks right doesn’t mean it performs electrically. Always follow the manufacturer’s instructions. They matter more, than tips. Learning what is a crimping tool can help you avoid using an unsuitable tool for a particular connector.
Frequently Asked Questions
Can You Crimp Wires Without the Actual Tool?
It is not recommended for terminals.Using pliers on terminals can bend a connector unevenly and create an unreliable joint.Use the specified connector combination, on electrical terminals especially when failure could cause heat, equipment damage or injury.
Is a Crimping Tool the Same as Pliers?
No. Pliers grip hold or bend objects whereas crimpers have specialized jaws or dies that allow them to crush specific types of connectors. While some can appear similar, standard pliers can’t be used as a substitute for the right crimper.
How Do You Know if a Crimp Is Secure?
I check that the conductor is in a position. I check that the terminal has no damage. I check that the crimp follows the connector instructions. I do any test or visual inspection. A tidy look, by itself does not show that a connection meets the needed standard.
Conclusion
A crimping tool is basically just for squishing a wire into a connector so it doesn’t pop out. Just make sure you’re using the right tool and the right die for whatever connector you’re using, otherwise it’s probably not gonna hold. Also, read the manual. If you’re doing electrical stuff, stay safe—and if you have no clue what you’re doing, just call a pro before you break something. Now that you understand what is a crimping tool, you can choose the right model for your wiring needs.
Choosing the right crimping tool can make every connection more secure and reliable. With the right tool and proper technique, even a small wiring task can lead to a cleaner, more professional result.